
Tutorial
1.Download the brush set and install it.
2.Now I’ll show how to take a child with a big imagination and turn him into the powerful being he imagine himself to be.
3.We’ll start by creating a new layer on top of our original and filling it with black. Next we want to select Filter >> Render >> Lighting Effects >> Lens Flare
4.Use the 105mm Prime with the Brightness setting of your choice.
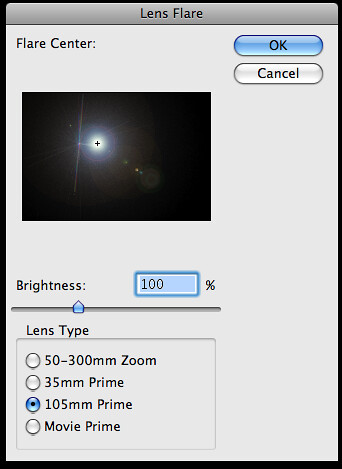
5.This will create a bright flash. Move it to the point where you want the ‘energy ball’ to appear.
6.You may notice that when you move it, you can see the edges of the layer. To rectify this, select the layer and add a ‘Layer Mask’.
7.Select default colors (white and black). With the layer mask selected, use the Gradient Tool >> Radial Gradient >> Reverse and drag from the center outwards. This will mask everything in a sphere around the center.
8.Set both of these layers to the ‘Hard Light’ setting.
9.I like to use the Image >> Adjustments >> Photo Filter to make the colors “pop”. I also used this setting to make the lens flare a bluish color. There are other ways to do this so experiment with your options.
10.Using the Brush set we installed earlier we want to apply them to the energy balls. I used the color black, with the layer’s Blend Options set to ‘Overlay’.
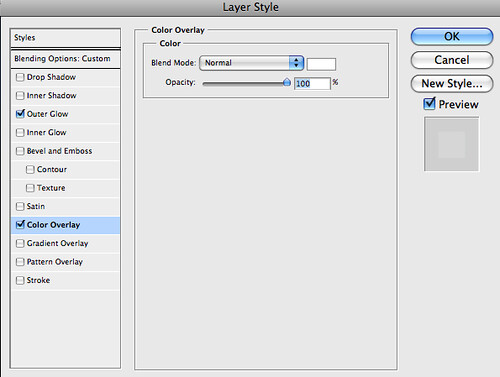
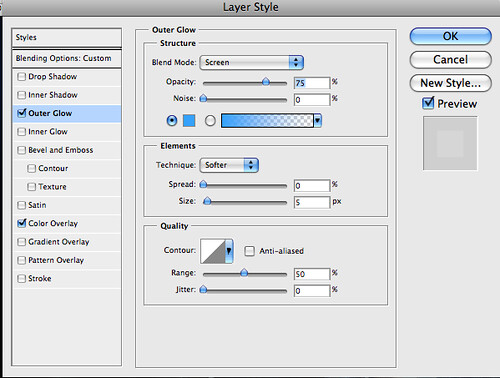
11.With this layer selected, set the Layer Style settings like so:
12.Using the same technique that we used in Step 7, we want to mask the edges of our brush layers.
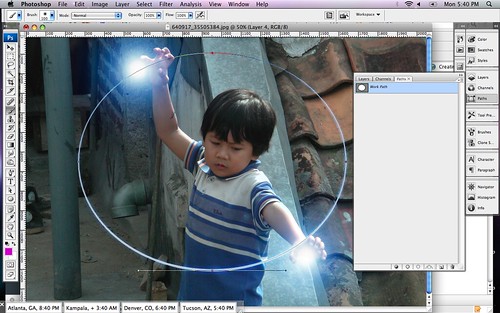
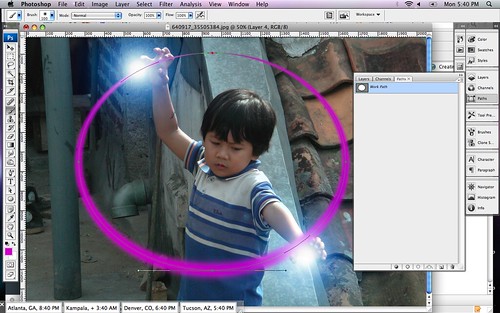
13.To create the ‘arc of light’ we’ll use paths. Select the ‘Ellipse Tool’ and change it from ‘Shape layers’ to ‘Paths’. Now, draw a large circle or ellipse that includes both energy flares.
14.Once the arc is drawn we want to stroke it (no jokes please). Select a brush that’s very small, maybe about a brush with a 5px diameter and use the color white. Go to ‘Paths’ right click on the selected path, and select ‘Stroke Path’. Check the ‘simulate pressure’ option, this will give the ring a bit of perspective with a heavier stroke on one side and a lighter stroke on the opposite side.
15.Repeat this step twice. Each time use a different brush setting that is bigger than the one before it. I started with the 5px brush, then I used a 45px brush followed by a 100px brush. Each time use a different color. The topmost (bigger) arc should be set to ‘Linear Dodge (Add)’ with an opacity of 35%. The middle layer should be set to ‘Overlay’ and the original (the white one) should be set to ‘Linear Dodge (Add)’.
16.I grouped these together then, using the technique from Step 7 again, I use layer masking to block one half of the sphere I created.
17.To create the energy ‘tendrils’ that are leaping from the arc. Duplicate the grouped folder from Step 16. Then merge the group or folder into one layer. Select Filter >> Liquify and distort the arc to look like it should for your image. Secondly, we’ll select Filter >> Distort >> Ripple and tweak it to look a bit more like electricity.
18.Now we’re done. Outside of some techniques that I used to make the image more polished, this completes the tutorial.